06 · Guide
Motif library
Place built-in motifs, save your own selections and use community designs.
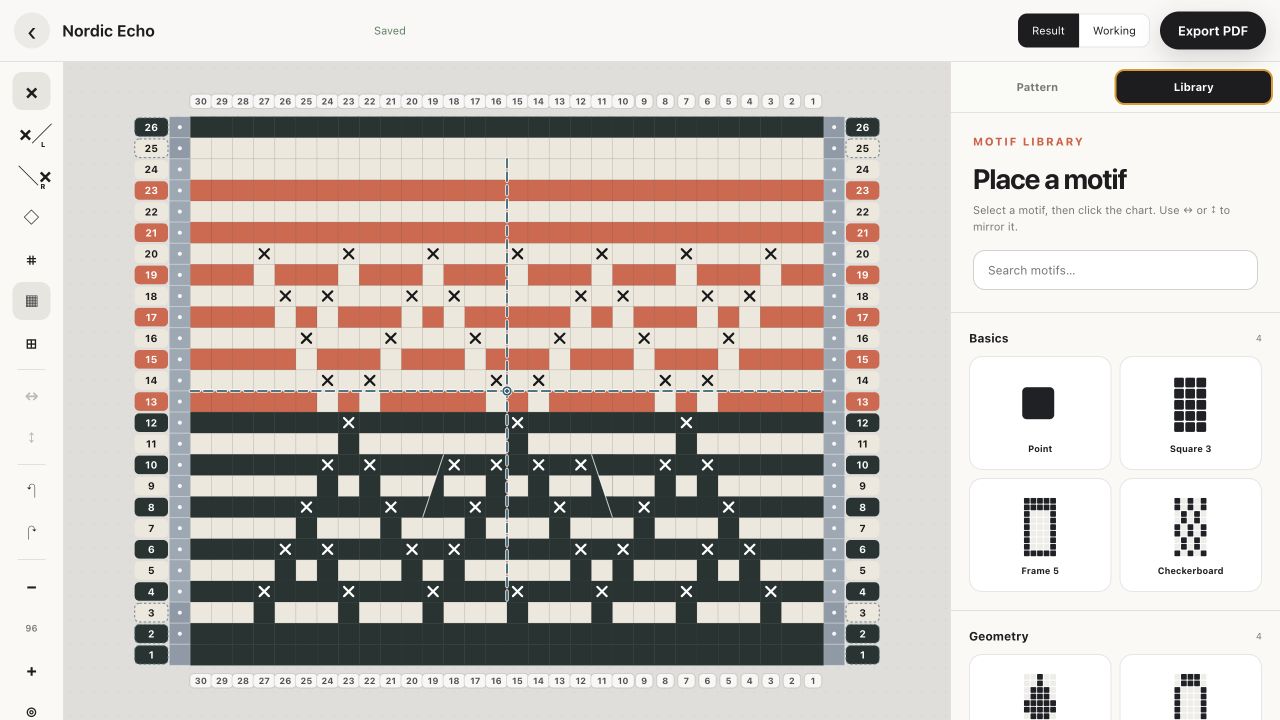
Open and search the library
Choose the grid icon on the left or the Library tab in the inspector. Search filters names across Basics, Geometry, Symbols, Alphabet, Numbers, My motifs and Community.
Place a motif
Choose a motif card, then click the chart where its top-left corner should begin. Parts outside the editable edge are clipped. Empty cells in the motif clear stitches inside its placed area so the motif keeps its intended shape.
Mirror before placing
After choosing a motif, the horizontal and vertical mirror buttons become available. Mirroring also swaps diagonal left/right stitch directions correctly.
Save part of your chart as a motif
Choose the selection tool, drag a rectangle around the stitches, enter a name and save. A selection must contain at least one drop-down stitch. The new item appears under My motifs.
Private and community motifs
Your motifs are private by default. Choose “Share with community” to let other users place a copy. You remain the owner and may make it private again. Other users cannot edit or delete your motif.
Delete a motif
Only motifs you own show the delete action. Deleting removes the library item, not stitches already placed in existing projects.