04 · Guide
Editor basics
Move around the chart, switch views and understand automatic saving.
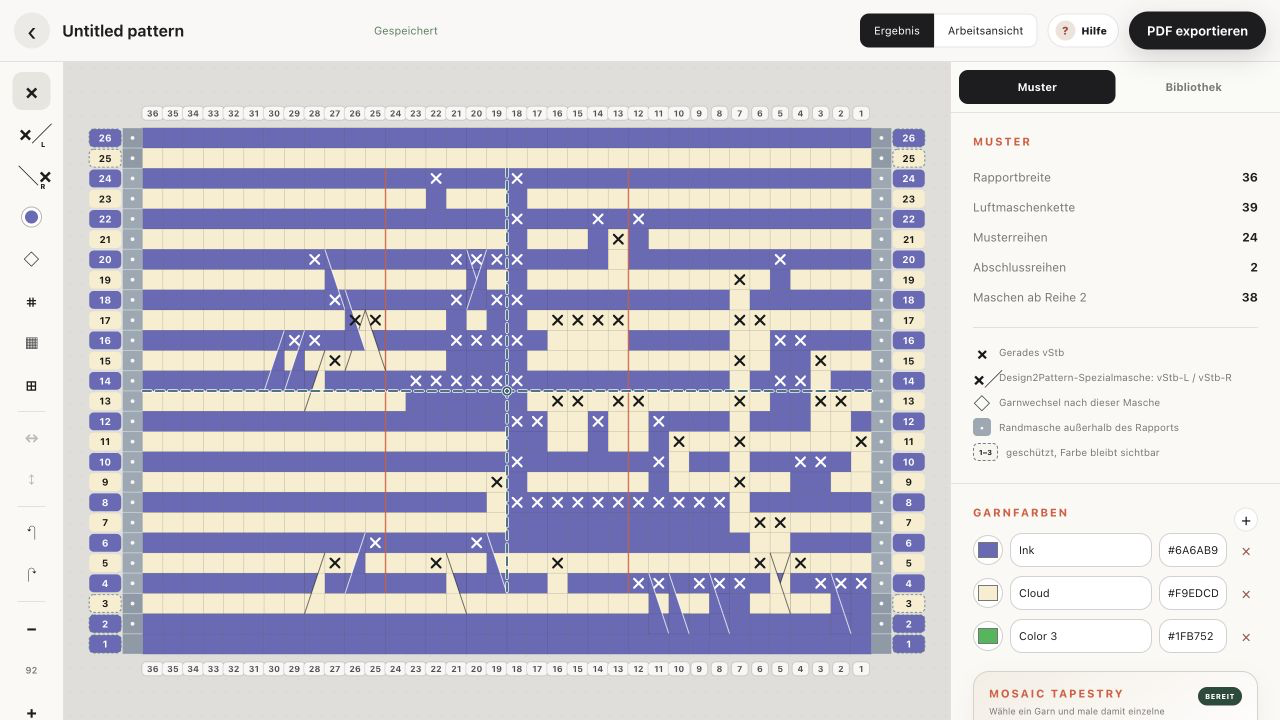
Read the editor layout
The left rail contains drawing and navigation tools. The chart is in the centre. The right inspector shows dimensions, colours, checks, written instructions and the motif library.
Result and Working views
Result shows the colour that should be visible in the finished fabric. Working shows the technical stitch chart. Switch between them at any time; your pattern data does not change.
Rename and autosave
Edit the project name at the top. Pattern changes are saved automatically after a short pause. “Saved” confirms that the server accepted the latest version. Do not close the tab while “Saving…” is visible.
Zoom and centre
Use + and − to zoom. The percentage button shows the current zoom. Use the target-shaped Centre button if the chart has moved out of view. A trackpad or mouse wheel can pan the canvas.
Undo and redo
Undo reverses the last drawing, erase, motif or copy action in the current editing session. Redo restores an action you just undid. Reloading the editor starts a new local undo history.
Read the numbers and guide lines
Rows are numbered on both sides; stitches are numbered at the top and bottom. Solid repeat lines separate repeats. The petrol dashed centre lines divide only the editable area and support the copy tools.